Use shift, xshift, yshift, and shift only Key in LaTeX TikZ to Reduce the Workload of Calculating Coordinates
Jun. 09, 2025 • Updated Jun. 09, 2025
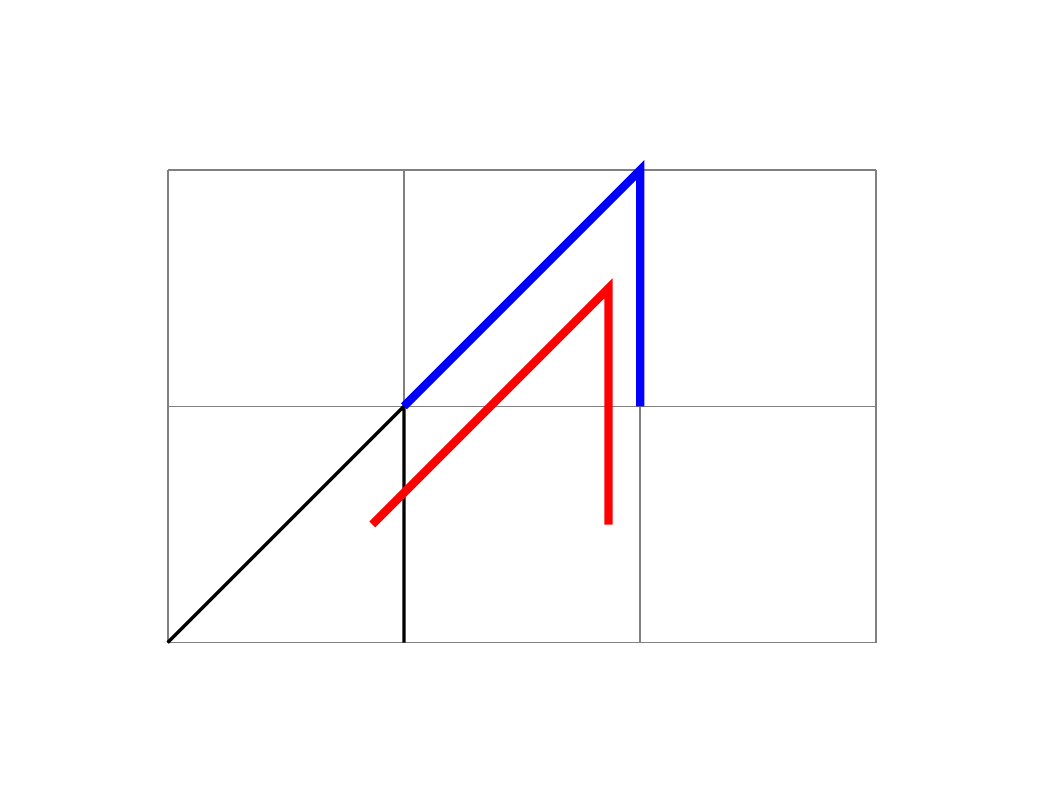
Example 1: shift key (1, p. 375)
1
2
3
4
5
6
7
8
9
10
11
12
13
14
\documentclass[border=20pt,tikz]{standalone}
\usepackage{tikz}

\begin{document}

\begin{tikzpicture}
\draw[help lines] (0,0) grid (3,2);

\draw (0,0) -- (1,1) -- (1,0);
\draw[shift={(1,1)},blue,line width=1pt] (0,0) -- (1,1) -- (1,0);
\draw[shift={(30:1cm)},red,line width=1pt] (0,0) -- (1,1) -- (1,0);
\end{tikzpicture}

\end{document}
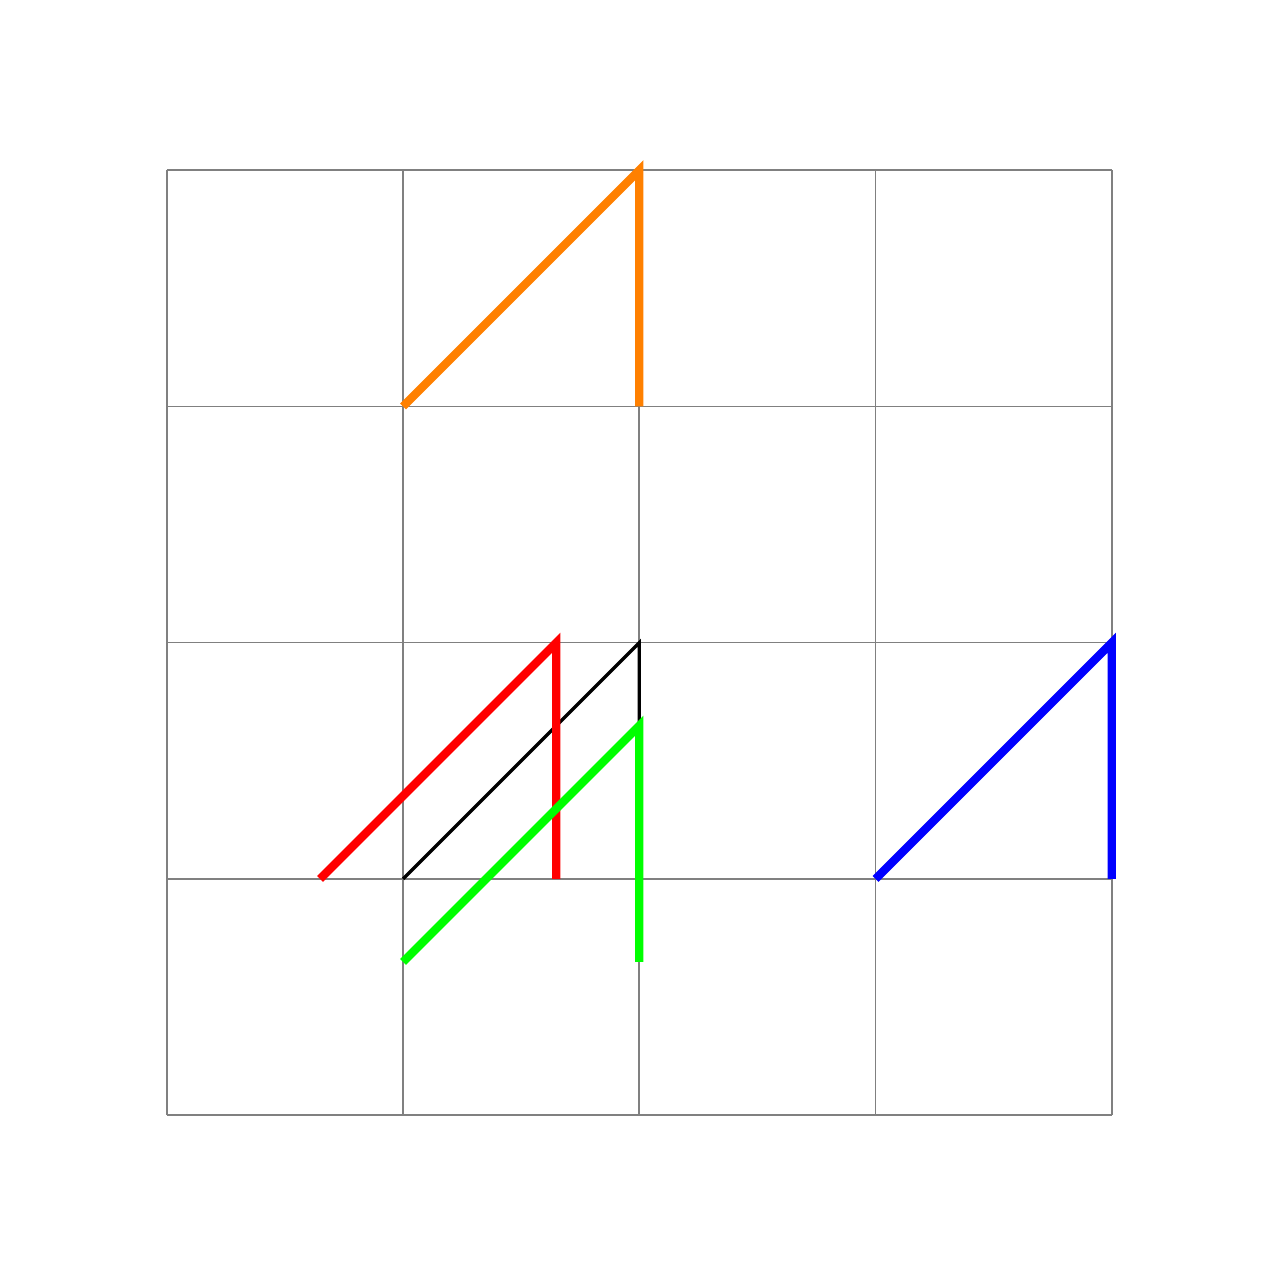
Example 2: xshift and yshift key (1, pp. 375-376)
1
2
3
4
5
6
7
8
9
10
11
12
13
14
15
16
\documentclass[border=20pt,tikz]{standalone}
\usepackage{tikz}

\begin{document}

\begin{tikzpicture}
\draw[help lines] (-1,-1) grid (3,3);

\draw (0,0) -- (1,1) -- (1,0);
\draw[xshift=2cm,blue,line width=1pt] (0,0) -- (1,1) -- (1,0);
\draw[xshift=-10pt,red,line width=1pt] (0,0) -- (1,1) -- (1,0);
\draw[yshift=2cm,orange,line width=1pt] (0,0) -- (1,1) -- (1,0);
\draw[yshift=-10pt,green,line width=1pt] (0,0) -- (1,1) -- (1,0);
\end{tikzpicture}

\end{document}
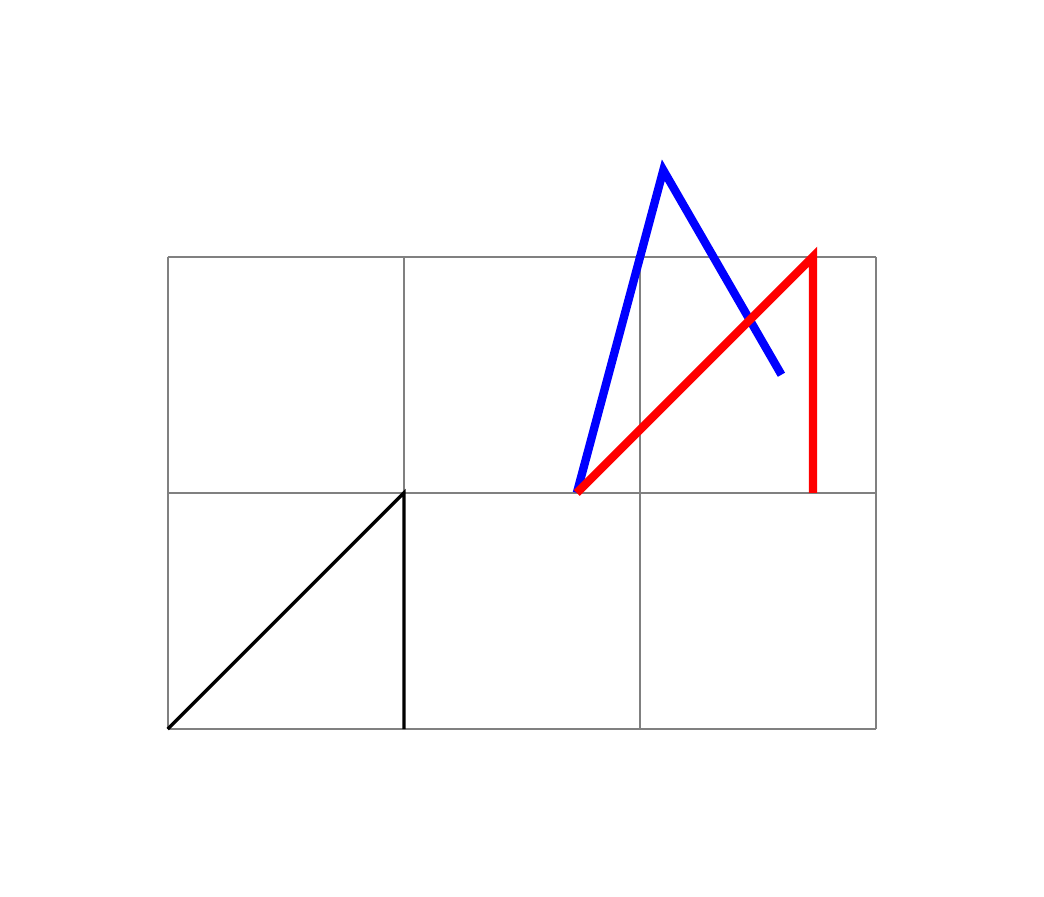
Example 3: shift only key (1, p. 375)
This option does not take any parameter. Its effect is to cancel all current transformations except for the shifting. This means that the origin will remain where it is, but any rotation around the origin or scaling relative to the origin or skewing will no longer have an effect.
This option is useful in situations where a complicated transformation is used to “get to a position”, but you then wish to draw something “normal” at this position.
1
2
3
4
5
6
7
8
9
10
11
12
13
14
\documentclass[border=20pt,tikz]{standalone}
\usepackage{tikz}

\begin{document}

\begin{tikzpicture}
\draw[help lines] (0,0) grid (3,2);

\draw (0,0) -- (1,1) -- (1,0);
\draw[rotate=30,xshift=2cm,line width=1pt,blue] (0,0) -- (1,1) -- (1,0);
\draw[rotate=30,xshift=2cm,line width=1pt,shift only,red] (0,0) -- (1,1) -- (1,0);
\end{tikzpicture}

\end{document}
Example 4 (1, p. 43, p. 375):
1
2
3
4
5
6
7
8
9
10
11
\documentclass[border=20pt,tikz]{standalone}
\usepackage{tikz}

\begin{document}

\begin{tikzpicture}
\draw (0,1) -- (0,1.5) [xshift=2cm] (0,1) -- (0,1.5);
\draw (0,0) rectangle (1,0.5) [xshift=2cm] (0,0) rectangle (1,0.5);
\end{tikzpicture}

\end{document}

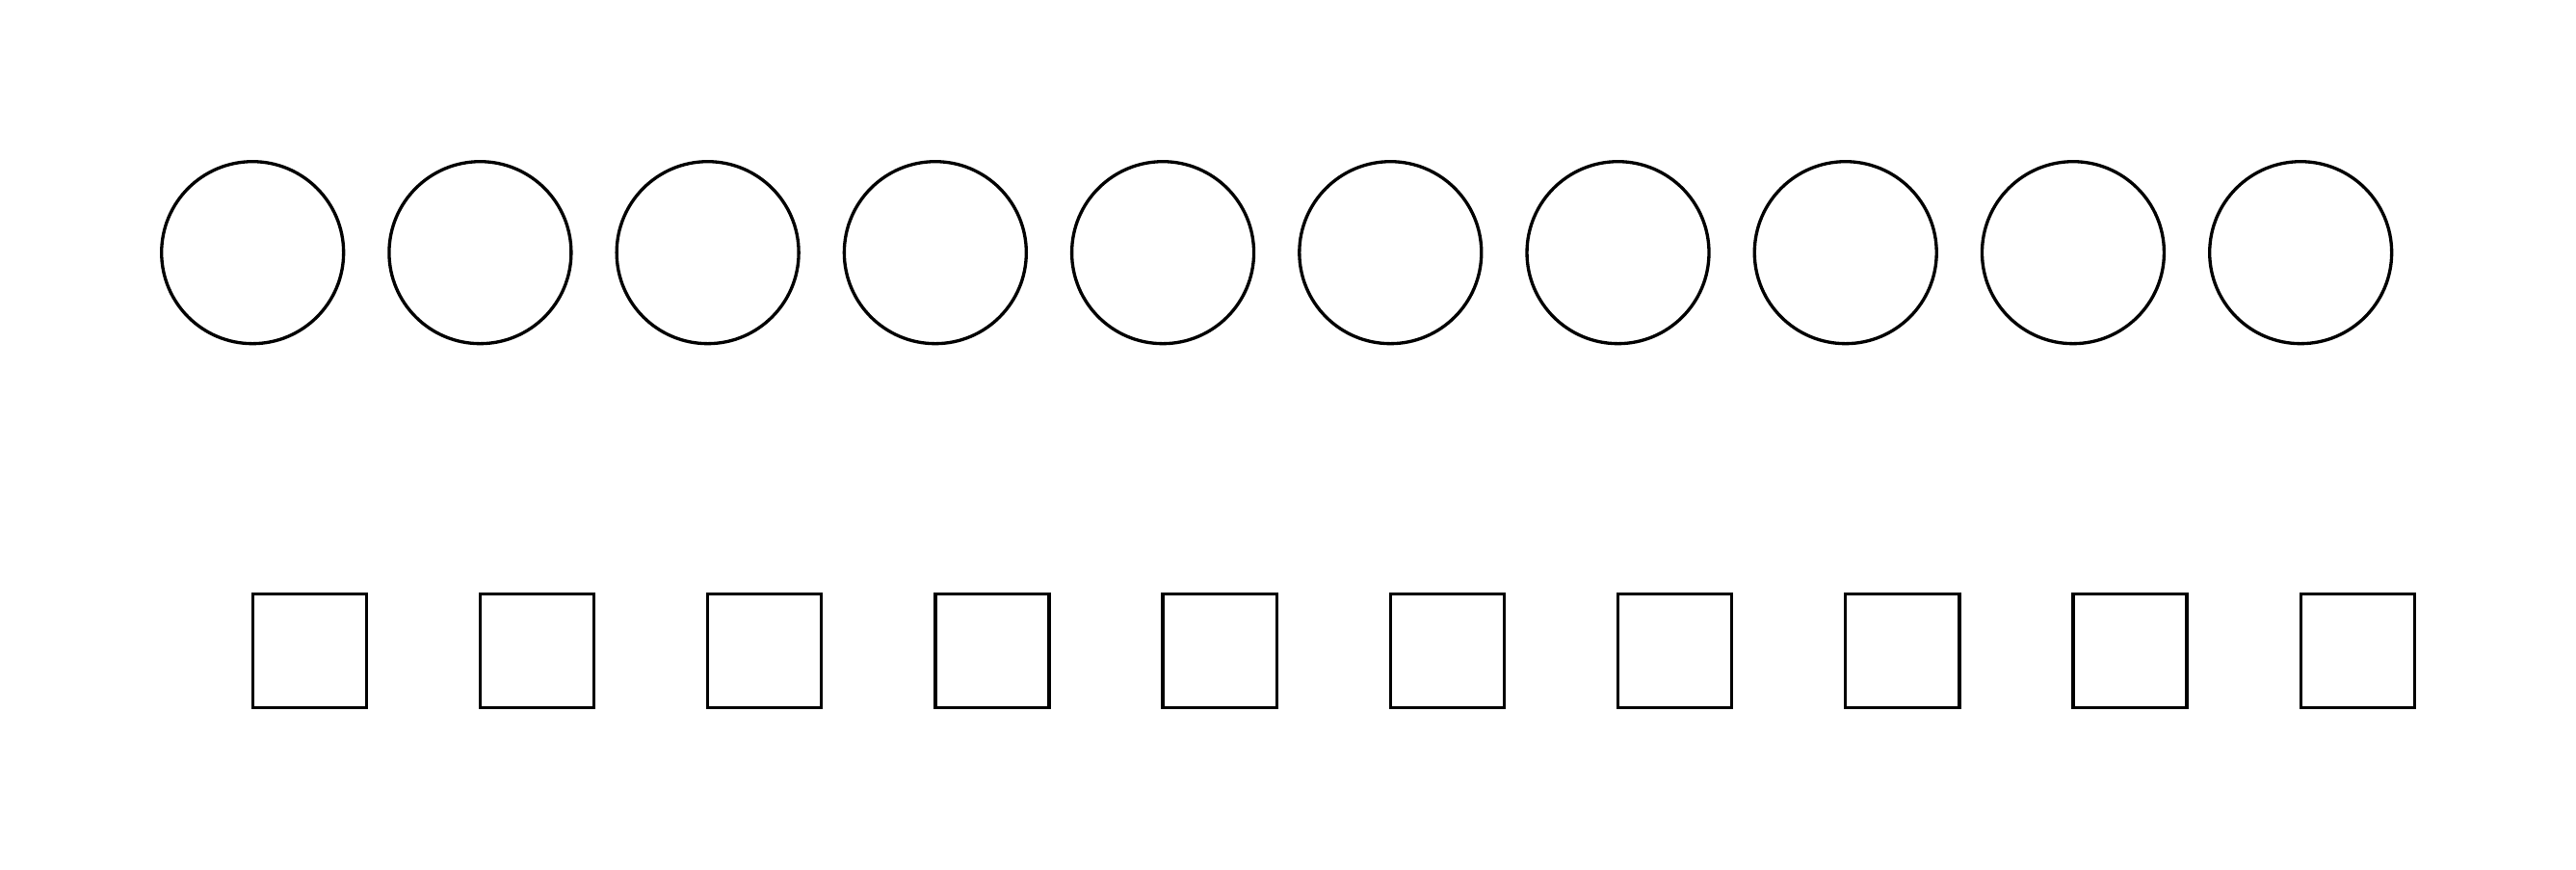
Example 5 (1, p. 44):
1
2
3
4
5
6
7
8
9
10
11
12
13
14
\documentclass[border=20pt,tikz]{standalone}
\usepackage{tikz}

\begin{document}

\begin{tikzpicture}
\foreach \x in {1,...,10}
	\draw[xshift=\x cm] (0,0) circle (0.4cm);

\foreach \x in {1,...,10}
	\draw[xshift=\x cm,yshift=-2cm] (0,0) rectangle (0.5cm,0.5cm);
\end{tikzpicture}

\end{document}
Example 6: See the example in blog2. It shows the case of using xshift for the scope environment.
References